// STEP 4 OF 4 //

Activate, configure and start

The last step, and the shortest. Paste your key, connect your broker account, glance at two settings, and press Start.

Enter your activation key

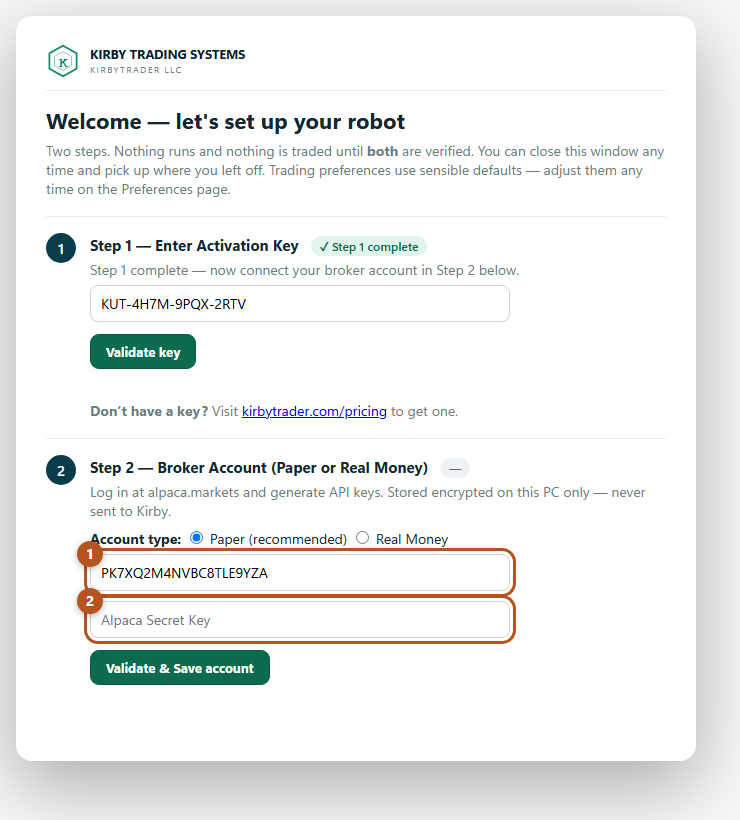
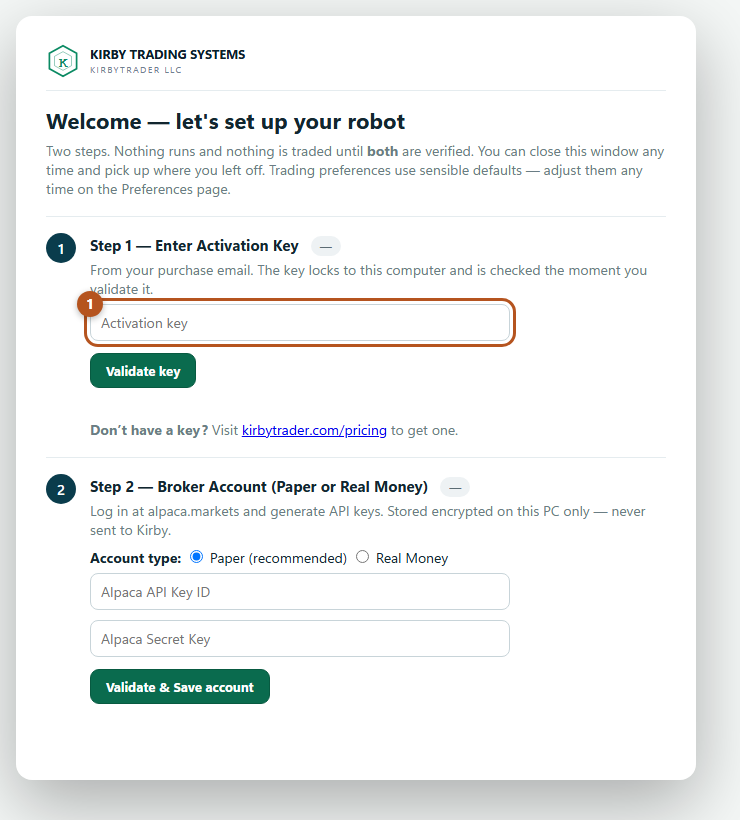
The app opens on a two-step setup. Nothing runs and nothing is traded until both steps are verified — you cannot accidentally start trading during setup.

The first-run setup window. Step 1 asks for the activation key; Step 2 asks for the Alpaca API key and secret.
Paste the key from your email into Step 1 and click Validate key.

The key is checked against our licence server immediately and locked to this computer. Once it is accepted you will see Licensed through and a date — that is the day your current licence period ends.

Active and Inactive, in plain termsActive means the licence is valid and the robot may open new trades. Inactive means it may not — because the licence expired, or an administrator paused it. Inactive is not a crash and it does not abandon your positions: everything already open stays fully managed to its normal target or stop. The dashboard always tells you which state you are in and why.
The dashboard's Robot Status card reading Active, with the licensed-through date beneath it.
Active, with the date your licence runs through.
The dashboard's Robot Status card reading Inactive, explaining that open positions remain managed and how to renew.
Inactive states always say what happened, what it means for your open positions, and what to do.
// CONNECT YOUR BROKER //

Connect your Alpaca account

  1. Choose the account type first

    Paper (recommended) or Real Money. This is the single most consequential choice on the screen. If you are new, choose Paper — you can switch later without reinstalling anything.
  2. Paste the key ID and the secret

    Both come from Alpaca in Step 1. They must be from the same account type you selected — paper keys for paper, live keys for real money.
  3. Click Validate & Save account

    The app connects to your brokerage there and then. If the keys are wrong you are told immediately and nothing is saved, so you can simply correct them.
Setup Step 2 with the account type set to Paper and the Alpaca key ID and secret fields highlighted.
The key ID goes in the first box, the secret in the second. Both are illustrative values, not real keys.
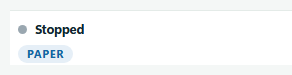
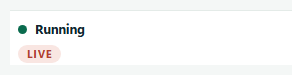
Always know which mode you are inGetting this wrong is the most expensive mistake available to you, so the app shows it in three places at once: a badge in the bottom-left corner of every screen, a Mode card on the dashboard, and the account line in Settings. Blue PAPER means simulated money. Red LIVE means real money is at risk. If you are ever unsure, look at the bottom-left corner before you press anything.
The bottom-left corner of the app showing a blue PAPER badge.
Blue PAPER — simulated money.
The bottom-left corner of the app showing a red LIVE badge.
Red LIVE — real money.
// YOUR SETTINGS //

Four settings worth understanding

Everything is already set to sensible defaults, so you can skip this and press Start. But these are worth a minute of your attention. The first two are Step 3 of first-time setup, so you meet them while the wizard is still open; the other two live on the Preferences page — where all four can be changed at any time.

Want more than a summary? The Strategy Guide walks every one of these options with annotated screenshots and honest notes on why customers choose differently.

Choosing your Capital Allocation

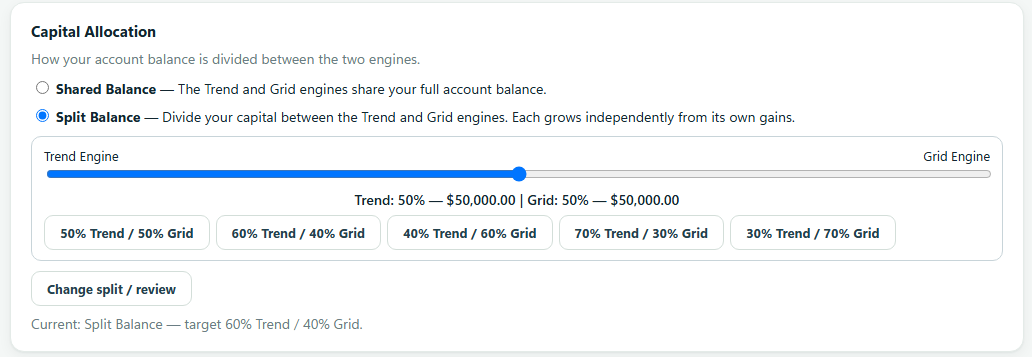
Shared Balance is the default: both engines trade from your full account balance, and cash one engine is not using is immediately available to the other. Split Balance divides your capital between the engines by a ratio you choose — each then keeps its own balance and compounds its own gains, like two accounts inside one.

If you pick Split, a slider sets the division — for example “Trend: 60% — $6,000 | Grid: 40% — $4,000” on a $10,000 account — and the confirmation spells out exactly what each engine will start with. The ratio is the initial division only: from then on the two balances drift apart naturally with each engine's own results, and that is by design. There is no automatic rebalancing.

The preset buttons under the slider always name both engines — “60% Trend / 40% Grid” and so on — so one tap sets a common division and there is never a bare number to misread.

You can switch either way later. To divide an account that is already running, go to Preferences → Capital Allocation, choose Split Balance, set the ratio and press Review & apply. A screen then shows each engine's current positions, the cash each would receive and the balance each would start with — nothing changes until you tick the box and confirm. If one engine already holds more than the share you picked, it simply receives no new cash — nothing is ever sold to force the division — and the account reaches your ratio over time as that engine's later gains go to the other side instead. Going back to Shared Balance is instant: the two balances pool again, and again nothing is sold.

Wondering which to pick? The Strategy Guide's Shared Balance vs. Split Balance section describes why customers choose differently.

The Capital Allocation step with Shared Balance and Split Balance options, and the ratio slider showing Trend and Grid percentages with dollar amounts.
Shared Balance is the default. Pick Split Balance to give each engine its own budget.

Growth Mode vs. Income Mode

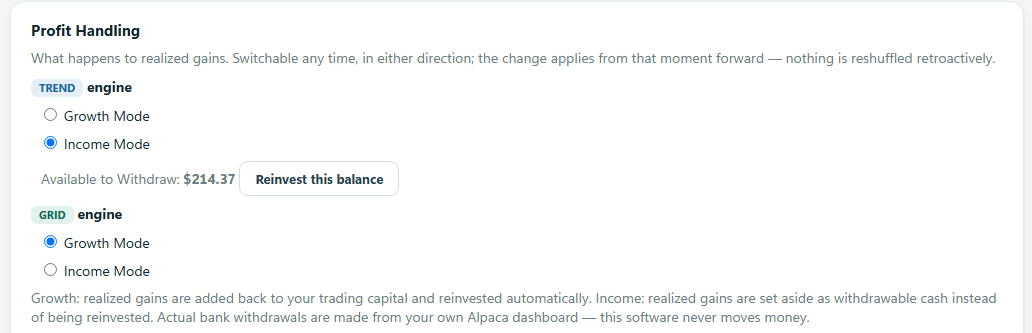
Growth Mode is the default and is exactly what the robot has always done: realized gains are added back to your trading capital and reinvested automatically, so position sizes grow as the account grows.

Income Mode sets realized gains aside instead. The set-aside money shows on the main screen as “Available to Withdraw”, the engines never trade it, and your trading capital stays level rather than compounding. If a trade later loses, the loss comes out of the set-aside balance first — so “Available to Withdraw” is always your net realized profit since you switched it on, never borrowed principal.

Switch between the two any time in Preferences; the change applies from that moment forward. Switching back to Growth keeps anything already set aside visible and withdrawable until you press “Reinvest this balance”. In Split Balance, each engine has its own switch — you can compound the Grid engine while taking the Trend engine's profits as cash.

The Strategy Guide's Growth Mode vs. Income Mode section covers why customers pick one or the other.

The Profit Handling step with Growth Mode and Income Mode options.
Growth reinvests gains automatically; Income sets them aside for withdrawal.

Which strategies run

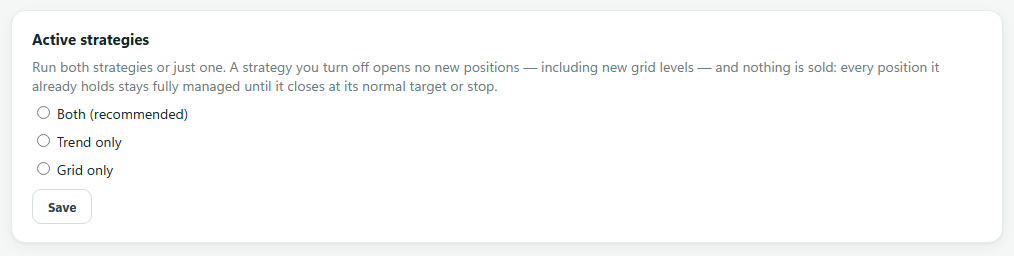
The app contains two independent strategies that share one account: Trend looks for stocks starting a sustained move and holds them with a stop and a target; Grid buys small amounts as a stock dips and sells them back as it recovers. Both is the default and the recommended setting — they behave differently in different markets. Turning one off stops it opening new positions; anything it already holds is still managed to its exit.

The Active strategies setting with Both, Trend only and Grid only options, and each strategy's current state.
Leave this on Both unless you have a reason not to.

Risk per trade

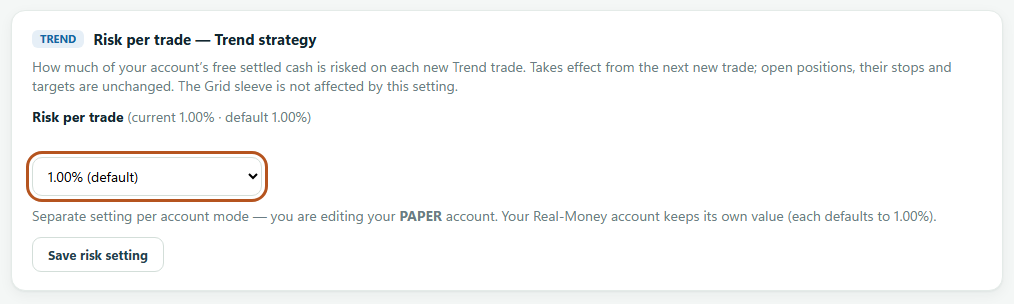
This is how much of your account's free cash the Trend strategy puts at risk on each new trade, from 0.25% up to 3.50%. The default is 1.00% and it is the sensible place to start.

In plain terms: at 1.00% on a $10,000 account, a trade is sized so that if it goes wrong and hits its stop, roughly $100 is lost — not the whole position, and not the whole account. A higher number means bigger positions, bigger gains when it works and bigger losses when it does not.

Paper and real money keep separate values. Turning it up while experimenting on paper cannot change what your real-money account does. A change applies to the next new trade — positions already open are never resized.

The Risk per trade setting for the Trend strategy, showing 1.00% selected and marked as the default.
Pick a value, click Save risk setting. The note underneath tells you which account mode you are editing.
// PRESS START //

Starting the robot

Click Start Trading in the top-right. The robot loads its market data, checks your account with the broker, and begins watching. The status in the bottom-left changes to Running.

Your first trade may not be today. That is normal.The robot only enters when its conditions are actually met — the right kind of setup, in the right kind of market, during market hours. It can easily watch for hours or days without buying anything, and a market-health filter deliberately stands it aside entirely when conditions are hostile. Silence is the system working, not the system broken. If you want to confirm it is alive, open the Activity page and watch it narrate what it is doing.

Where to look once it is running:

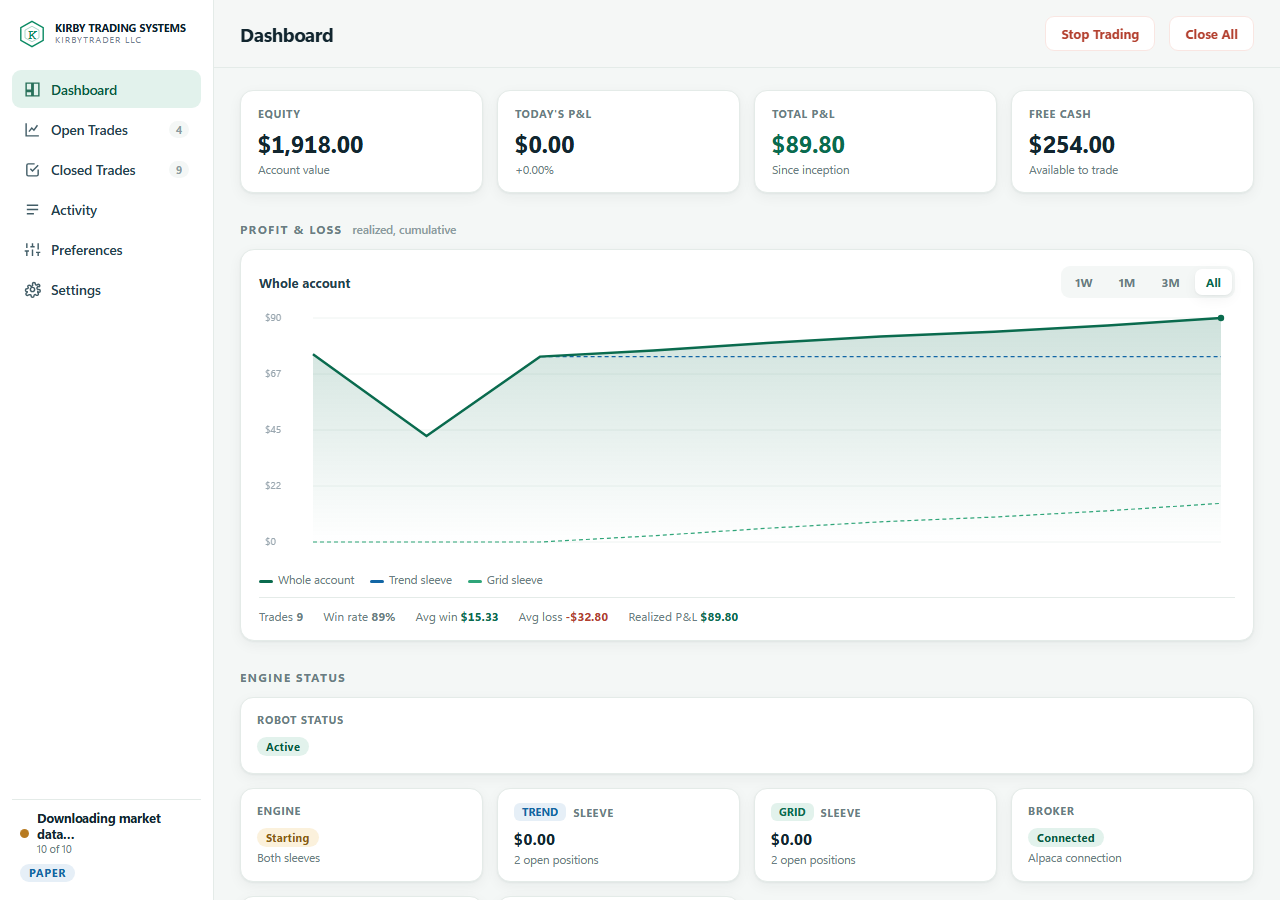
DashboardAccount value, today's and total profit and loss, free cash, and the status of whichever strategies you are running.
Open TradesEverything held right now, what it cost, what it is worth, and the profit or loss so far.
Closed TradesEvery completed trade with its result — the honest record.
ActivityA running commentary in plain language: what it looked at, what it decided, and why.
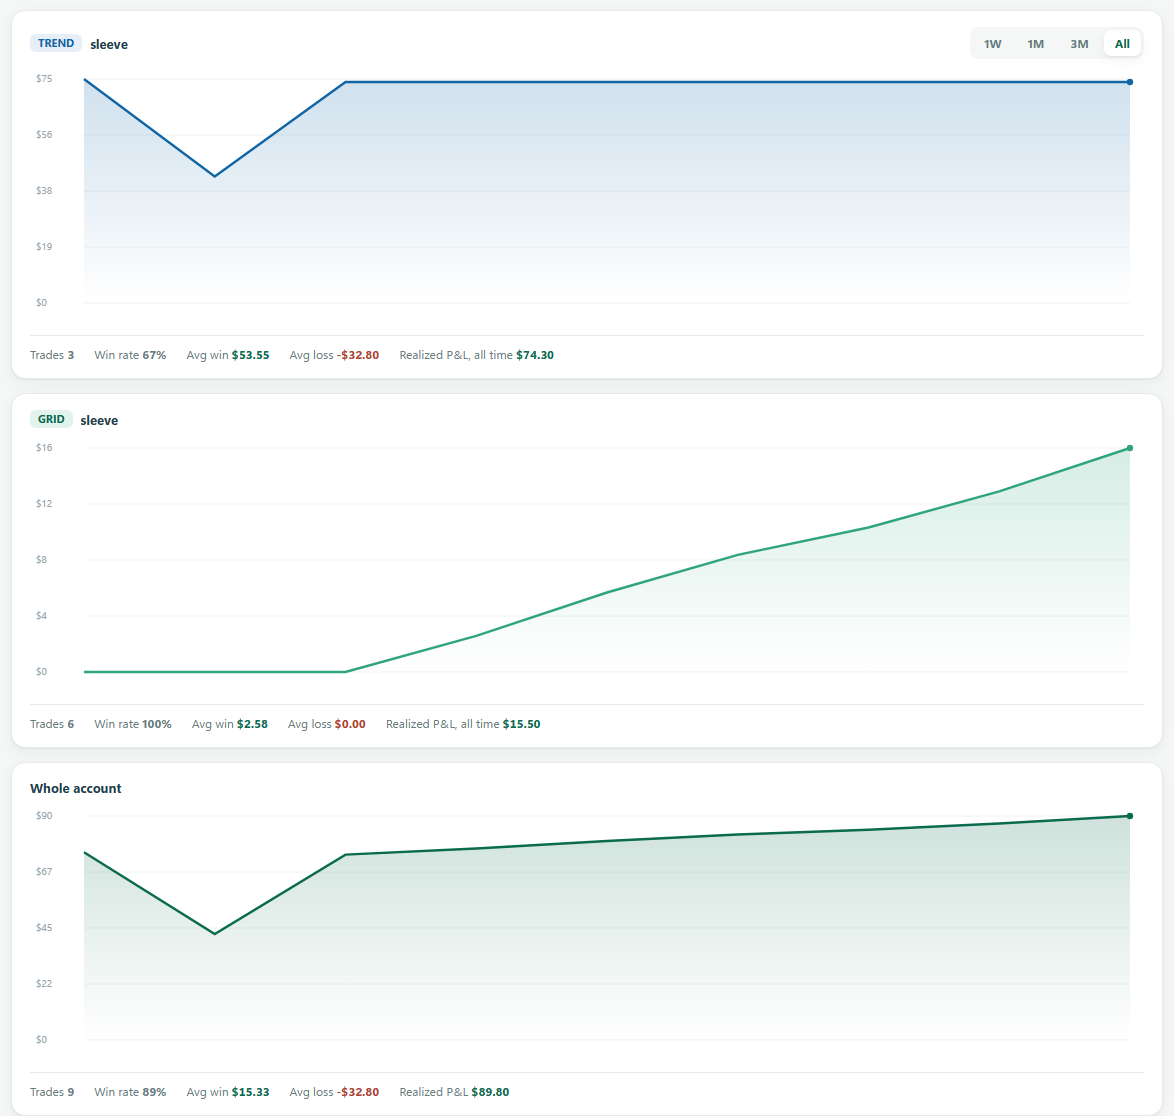
The Dashboard follows your setupWhat appears on the Dashboard depends on the choices you made in Preferences. Run one strategy instead of two and the other one’s cards, chart line and table column are simply not there. Choose Split Balance and each engine gets its own balance and its own profit-and-loss chart, next to one for the whole account. A strategy that has never traded and is holding nothing is not shown at all, rather than appearing as an empty card. A strategy you switch off while it still holds positions keeps its card and says in words that it is managing them out — nothing about money you still own disappears from the screen.
The dashboard while running, showing account value, profit and loss, a chart, and both strategies active on a paper account.
The dashboard once trades are on. (Shown on a paper account with simulated data.)
The dashboard in Split Balance showing three profit-and-loss charts, one for the Trend strategy, one for the Grid strategy and one for the whole account, each with its own trade statistics.
Split Balance: each strategy gets its own profit-and-loss chart and its own trade statistics, with the whole-account chart alongside them. (Shown on a paper account with simulated data.)
// CHANGING BROKER KEYS LATER //

If you need to change your Alpaca keys

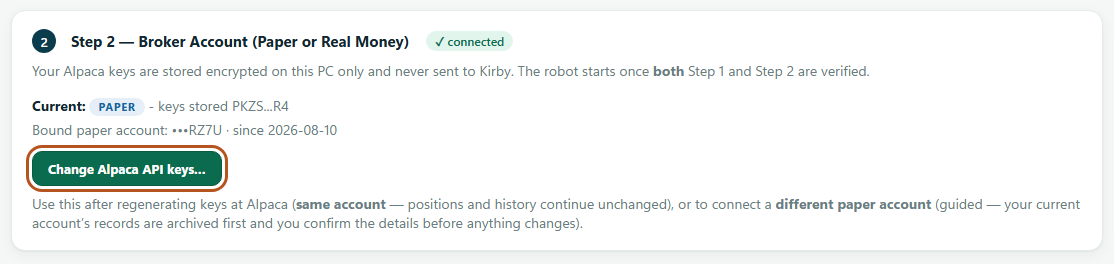
You might regenerate your keys at Alpaca, or move to a different account. Go to SettingsChange Alpaca API keys…

The Settings page showing the bound paper account and the Change Alpaca API keys button.
Settings shows which account is connected. The button reveals the key fields.
New keys, same accountNothing else changes. Your positions, history and settings carry on exactly as they were.
A different accountYou get a confirmation screen that spells out exactly what will happen first. The old account's records are archived and kept on your PC, the robot starts a clean slate for the new account, and it comes back stopped until you press Start.
Nothing is ever deleted behind your backSwitching accounts archives the old account's trade history rather than erasing it, and the app tells you the date of the last archive on the same screen.